This is an old revision of the document!
Image processing
White Balance
What is white color temperature
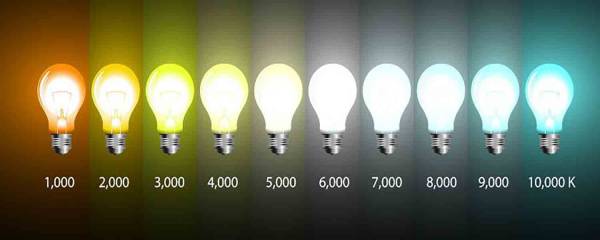
A “white” color has different chromatic characteristics, depending on its “temperature”. That temperature is traditionally expressed in Kelvin and corresponds to light, emitted by an ideal black body radiator, when heated to that temperature. Think of it as the color of a burning stick of wood at a camp site or a “red-hot iron” that looks more yellow when it actually melts in a furnace.
When a scene is illuminated by “white” color there's usually color correction needed to bring the “true” colors out. The “true” in this sense is an approximation of how our brains perceive colors during daylight, which is around 6000°K.
For our purposes, we are using individual color channel gains to compensate for a given temperature. Lower temperature “white light” needs a lot of blue added to it and very little red and as the temperature climbs up, the amount of added red grows while the added blue goes down.
Color correction for white temperature
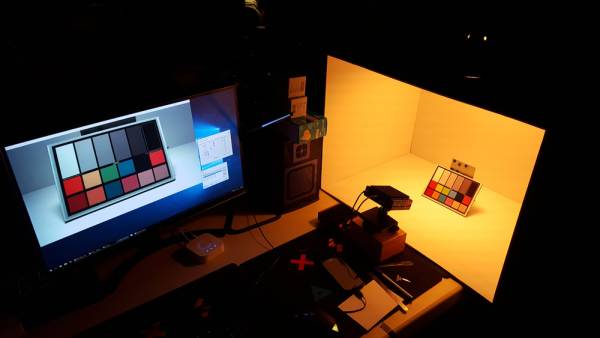
For the calibration purposes we have acquired a Philips “Hue White and Color Ambiance A19 LED Starter Kit” that allowed us to test various illumination scenarios for a range of color temperatures. For a given white color temperature setting we have dialed the red and blue gains to make the scene “white” (leaving the green gain at its constant value of 1024).
Corrections to the red channel were way more noticeable than those to the blue one so we approximated the blue gains' graph with a single line, described by the formula B = 4205.4 - T*0.4087.
Red channel gains are approximated by two line segments, bordering the 3500°K mark:
below 3500°K: R = 467.6 + T * 0.166
above 3500°K: R = 82 + T * 0.277
Experimental data and verification
Here is the table with the results of that testing and corresponding calculated values based on the above formulae:
| Manually set | Calculated | |||
|---|---|---|---|---|
| Color, K | Red | Blue | Red | Blue |
2000 | 800 | 3388 | 800 | 3388 |
2296 | 840 | 3285 | 849 | 3267 |
2592 | 913 | 3196 | 898 | 3146 |
2888 | 959 | 3078 | 948 | 3025 |
3184 | 1016 | 3005 | 997 | 2904 |
3480 | 1046 | 2858 | 1046 | 2783 |
3776 | 1119 | 2710 | 1128 | 2662 |
4072 | 1195 | 2519 | 1210 | 2541 |
4368 | 1296 | 2460 | 1292 | 2420 |
4664 | 1370 | 2298 | 1374 | 2299 |
4961 | 1458 | 2121 | 1456 | 2178 |
5257 | 1561 | 2033 | 1538 | 2057 |
5553 | 1620 | 1895 | 1620 | 1936 |
5849 | 1750 | 1782 | 1702 | 1815 |
6145 | 1738 | 1694 | 1784 | 1694 |
6500 | 1738 | 1694 | 1882 | 1549 |
Practical example
What does all that mean in practice? Suppose you have set up your scene with “white” lamps that are marked as 4100°K. Based on the above information you'd know that to get the best “natural” colors out of that scene means setting your red channel gain to 1217 and blue gain to 2529 while leaving the green gain at its default 1024 value.
Automatic white balancing
Quite often end users don't have the patience or the expertise (or both) to properly set up the white balance of the captured scene and prefer to rely on camera “just knowing what to do”.
Many algorithms are available today to deal with color normalization, some very sophisticated (and computationally expensive) and others, way less computationally expensive, but so simple that they are easily thrown off by thins like a huge green screen background or a bright super-yellow T-shirt.
Below is one of those “simplistic” approaches with a little twist, that makes it an excellent option for real-time image processing on even the most basic of the devices.
Overall idea
The general idea is based around an assumption that if one takes a look around and measures the color of every pixel, then the grand total sum of all those values should be close enough to a pure grey color. This idea has a name and it is the "grey world".
Unfortunately the world around is only grey if we are in a more-or-less neutral environment. Such is not the case with large patches of high-contrast colors (like "green screens") or even a relatively small patches of “highly toxic” colors, like bright yellow. These conditions affect the scene's average color sufficiently enough to throw it off and produce horrible color artifacts instead of normalizing the colors to their perceived values.
To combat the problem of “toxic colors” a simple twist is introduced: ignore all the pixels that are too saturated. Now, what exactly is “too saturated” is up for a debate and is quite subjective. In our experiments it looked like the threshold value should be chosen in such a way as to end up considering around 25-35% of all the pixels for the grey world calculation. For regular room environments that means the threshold should be between 20 and 30 but may need adjustment either way if the scene is poorly lit (adjust down) or has lots of highly saturated bright colors (adjust the threshold up).
Once we throw away all those pixels, that normally contribute to the normalization going wrong, we proceed with the “usual” grey world color normalization.
Step-by-step algorithm
Below are a few blocks of steps that describe the process in a top-down approach (which is generally easier to comprehend than the bottom-up):
- Figure out the adjustment and exit, if processing a single frame and the result is “close enough”
- Loop back to step one


